DI-701
Internet Server/Firewall
Frequently Asked Questions (FAQ)
Question #20: How Do I Download and Install v2.20?
Click on the link di701fw220.zip to download the new firmware. Save the firmware to your hard drive and then follow these instructions.
How Do I Automatically Add PPPoE Support to the DI-701?
Step 1
Use the RS-232 cable provided with the DI-701 to connect your computer and the DI-701, using your computer's COM ports. The COM ports, located at the rear of the computer, are labeled COM1 and COM2. Note which port you are using for the connection.
Step 2
Locate the DI-701 beta firmware v2.20 zip files and extract them to C:\di701\fw220.4.
Step 3
Click on Start select Run and type: C:\di701\fw220.4\setup at the command prompt.
Step 4
Click OK.
Step 5
At the DI-701 PPPoE BETA Firmware� window, click on the Start Version v.2.20 PPPoE for DI-701 Installation command button located at the lower part of the window.
Step 6
The Finished - copyprogs window will now appear, close the window by clicking on the upper right hand box with the X.
Step 7
Click on the Install Via COM1 command box if your RS-232 cable is on COM1 on your PC or Click on the Install Via COM2 if your RS-232 cable is on COM2 on your PC.
Step 8
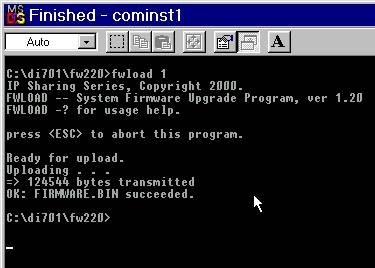
The cominst1 - FWLOAD window will now appear, when you see the print out Waiting for the device power on� reboot the DI-701 by unplugging the power supply jack waiting 5 seconds and then plugging the power supply jack back in.
The device is detected�Ready for upload�Uploading� are the messages that will be displayed while the DI-701 is installing the v2.20.4 beta firmware.
This is what you will see when the new firmware has been properly installed on your DI-701 Residential Gateway.
Step 9
If any error messages appears, check the cable connectivity and make sure that you have selected the correct COM port, then go through the steps again. Restart the DI-701 to activate the new firmware.
If there is a problem or an error message, click on the link to go to the instructions for a manual installation.
Click here to go back to DI-701 Frequently Ask Questions
How Do I Manually Add PPPoE Support to the DI-701?
Use this procedure if you have received an error message or had problems doing an automatic upgrade. Follow the instructions carefully to manually add PPPoE support to the DI-701.
Step 1
Use the RS-232 cable provided with the DI-701 to connect your computer and the DI-701, using your computer's COM ports. The COM ports, located at the rear of the computer, are labeled COM1 and COM2. Note which port you are using for the connection.
Step 2
Locate the DI-701 beta firmware v2.20.4 zip files and extract them to:
C:\di701\fw220.4
Winzip automatically creates the folder when the files are extracted.
Step 3
Locate the DOS Prompt on your PC: Click Start>Programs>MS-DOS Prompt.

Step 4
At the WINDOWS DOS Prompt, type this command:
C:\WINDOWS>cd\ and press Enter
Step 5
At the DOS prompt, type this command:
C:\>cd di701\fw220.4 and press Enter
Step 6
At the subdirectory of di701\fw220.4 type this command:
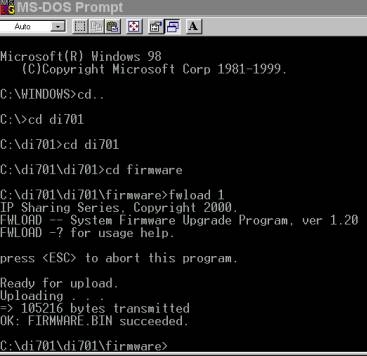
C:\di701\fw220.4>fwload 1 and press Enter
Step 7
Reboot the DI -701 by unplugging the power supply jack, waiting 5 seconds and plugging the power supply jack back in. The power supply jack is located at the rear of the DI-701 at the VDC IN port.
This is what your screen should display after the new firmware has been properly installed on your DI-701 Residential Gateway.
Step 8
If any error message appears, check the cable connectivity and make sure that you have selected the correct COM port, then go through the steps again. Restart the DI-701 to activate the new firmware.
Top
| 


